Workflow
Recruitment & onboarding guide
Hiring is one continuous funnel: an opening attracts candidates, a candidate is chosen and hired, and from that single click the person is routed one of two ways — straight onto the books as a local hire, or onto the expat immigration pipeline. Both routes land on the same onboarding checklist, and finishing it turns the hire into a full staff record. This guide follows that path end to end.
This is the guide HumanR users read inside the product, published as-is. It is written for someone with the screen in front of them, so it describes buttons you cannot click from here — which is rather the point: you can check how the product behaves before you commit to it.
The hiring funnel
Think of hiring as a funnel that narrows to a single decision and then splits:
- Sourcing (the ATS) — a job opening gathers many candidates and moves them stage by stage until one is chosen. This is the optional Applicant Tracking module.
- The hire — choosing a candidate routes them down one of two channels,
decided by the opening, not the operator:
- Local — the person becomes a staff record straight away.
- Expat — the person is handed to the immigration pipeline to work the quota and visa first.
- Onboarding — both channels arrive at the same checklist of everything a new joiner needs, ending when they become a proper staff record.
Sourcing candidates (ATS)
The Applicant Tracking System is the front of the funnel — it sits before the pipeline below. It models many candidates competing for one opening, rather than a single requested head. It's an optional module: where it's switched on you'll see Job openings and the Candidate board under Hiring.
- An opening carries both the internal requisition (department, hiring manager, headcount, salary band) and the public advert. Publishing it puts the advert on the careers portal, where candidates apply against it.
- Each application travels a fixed board — Applied → Screening → Shortlisted → Interviewing → Offer → Hired — with Rejected and Withdrawn off to the side. The pipeline is the same for every opening, so funnel analytics stay comparable.
- Along the way you can schedule interviews, collect per-interviewer scorecards, run reference / background checks, and send an offer.
Candidate contact details and CVs are personal data — the module captures consent on the public form and a nightly purge anonymises candidates once their retention window passes.
The hire — one click, two channels
When a candidate wins, you Hire them from their application. That one action is the bridge from the ATS to the rest of the system, and which way it goes is set by the opening's Expat role flag:
- Local hire (Expat role off) — a real staff record is created there and then (you supply a staff number), and an onboarding checklist is opened automatically from your current template. This starter shows as Local on the onboarding list.
- Expat role (Expat role on) — instead of a staff record, a recruitment request is created on the immigration pipeline at Offer signed, where the agency works the quota and visa. Onboarding waits until the person actually arrives; the starter then shows as Expat.
The expat recruitment pipeline
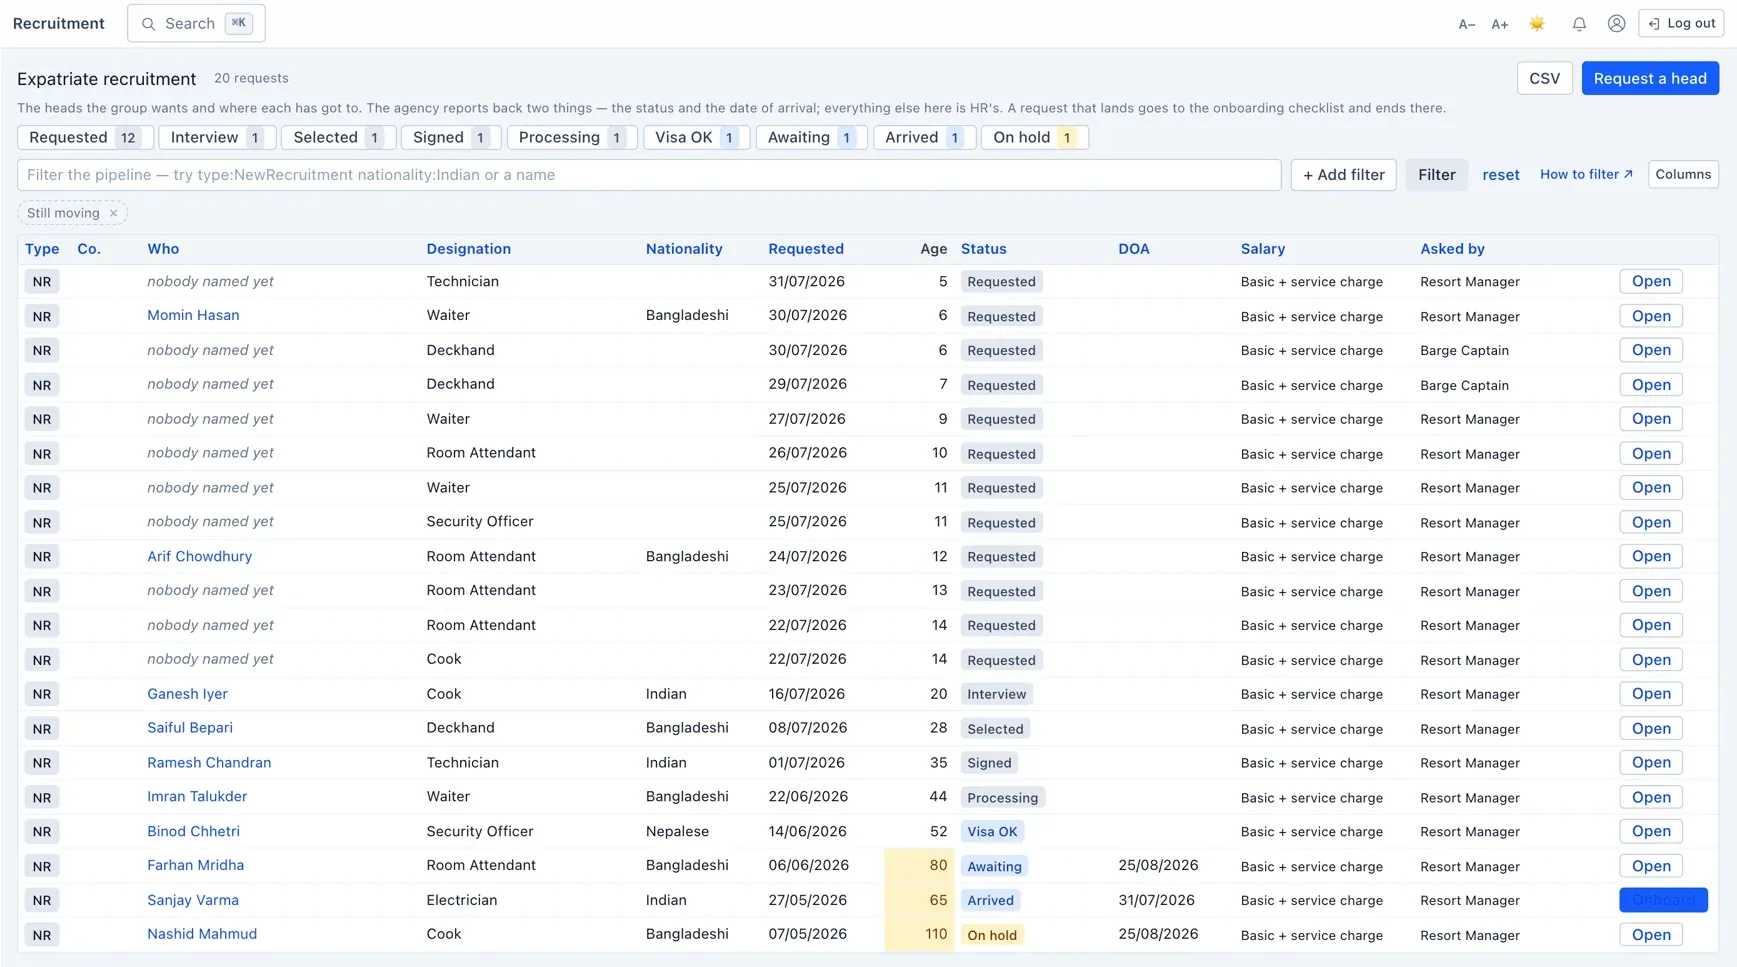
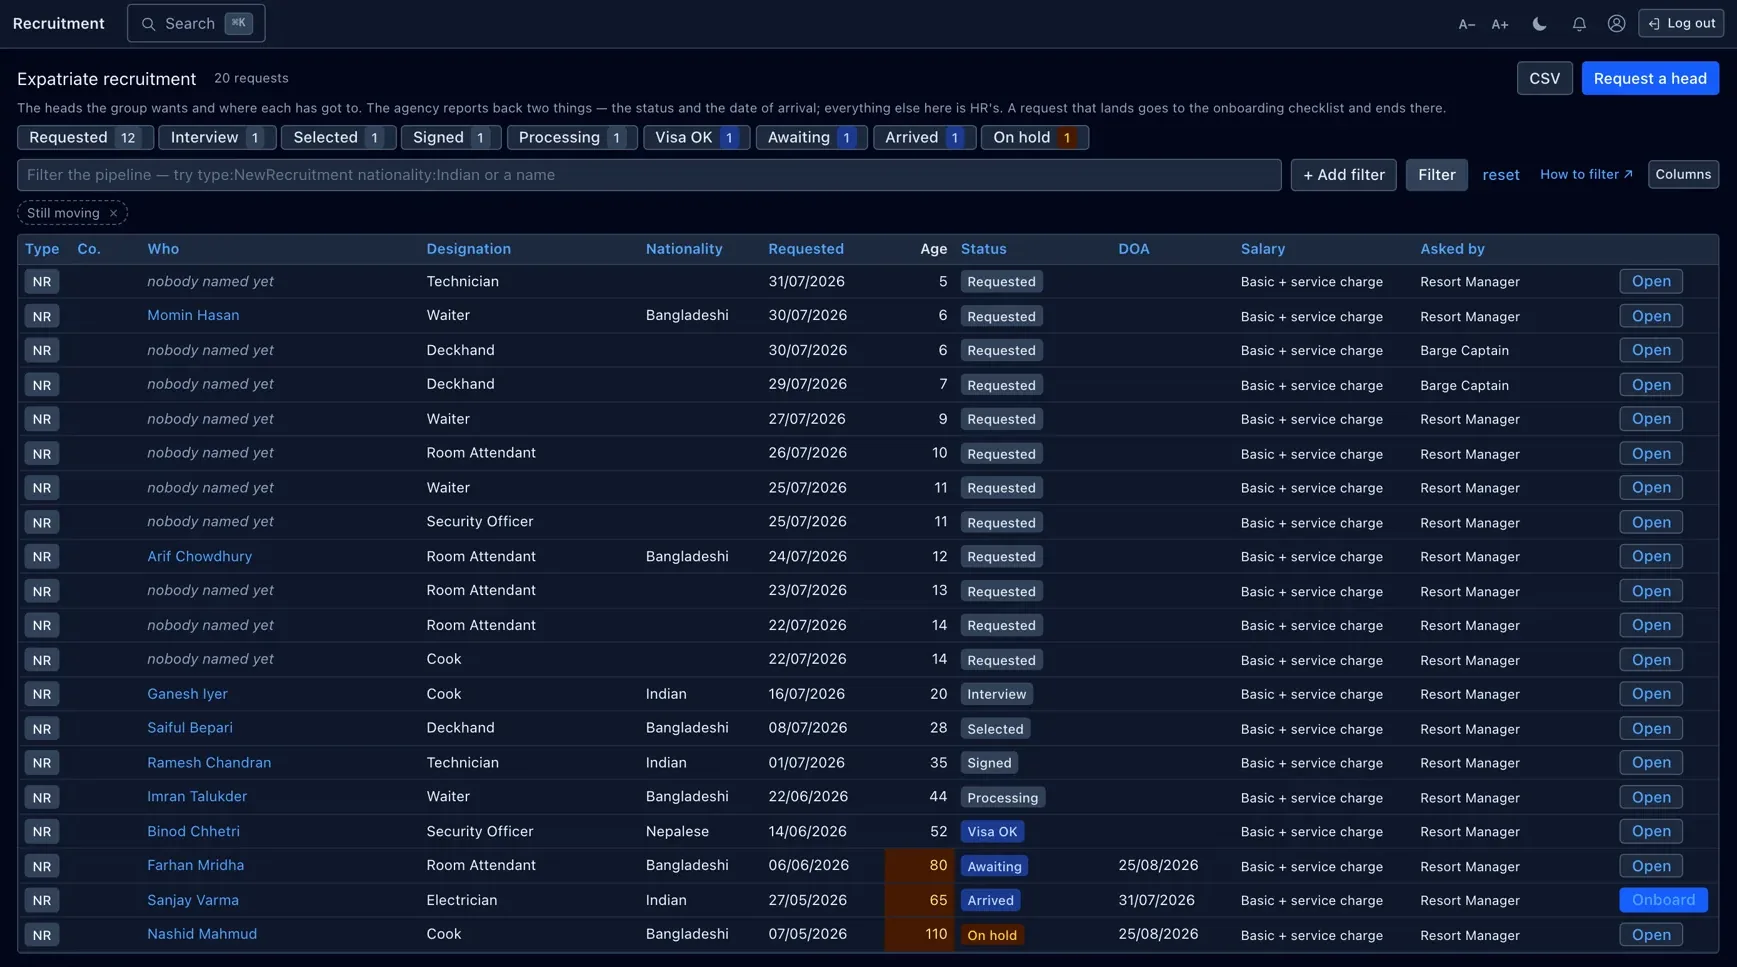
The recruitment pipeline is the expat channel: one row per requested head as it travels through immigration. A request can be a seat (a vacancy with no one named yet) or a person (a named candidate). Leave the candidate name blank and it's a vacancy; fill it in and it's that individual. Requests arrive here two ways — raised by hand (or imported from the sheet), or dropped in by a Hire on an expat opening.
Each request moves along an ordered pipeline, roughly:
Requested → Offer signed → Processing → Entry pass → Visa ready → Awaiting arrival → Arrived → Onboarded.
Two statuses sit off to the side: On hold and Cancelled. The recruitment agency owns two fields in practice — the status and the arrival date — and updates them as things progress.
Marking arrival
When the person actually arrives, mark the request Arrived and set the arrival date (which can be a near-future date, but not more than a year out — a guard against typos).
Starting an onboarding checklist
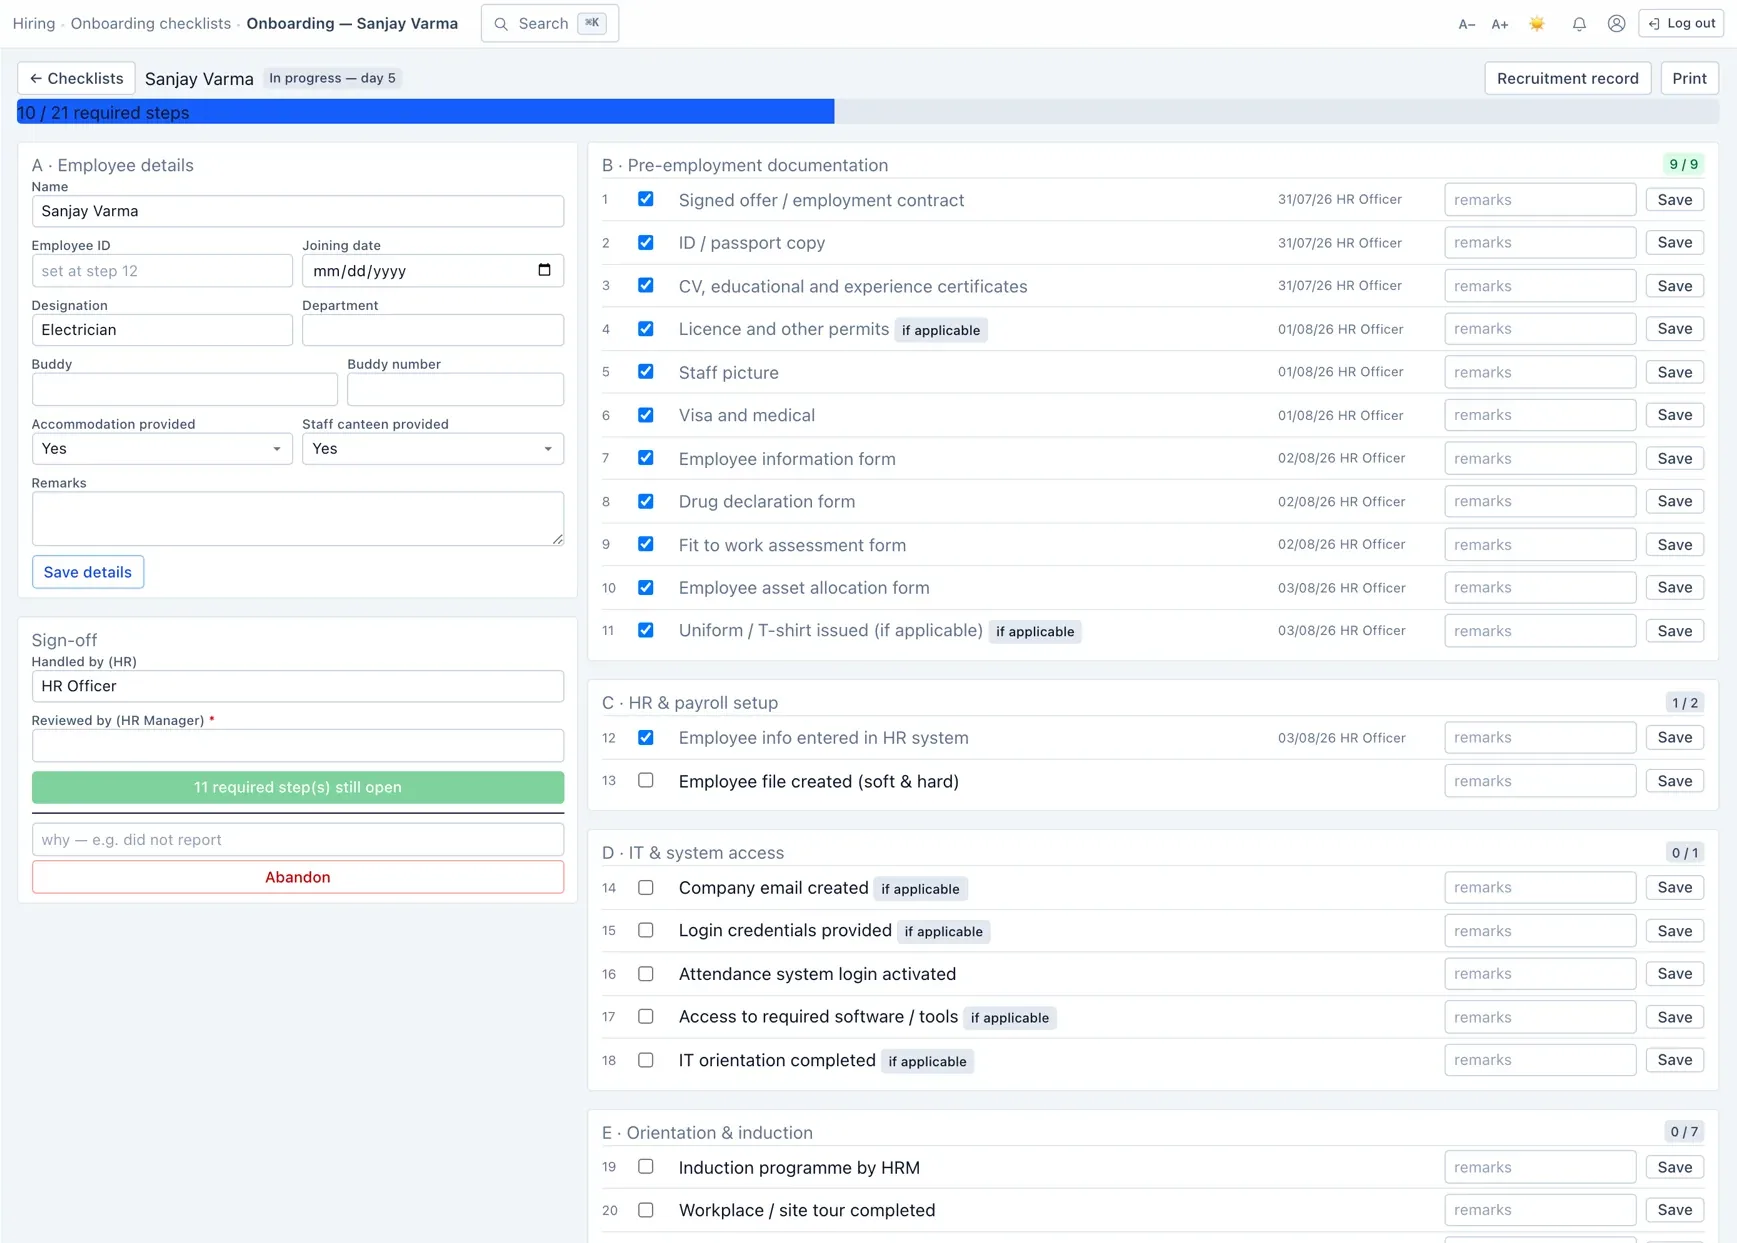
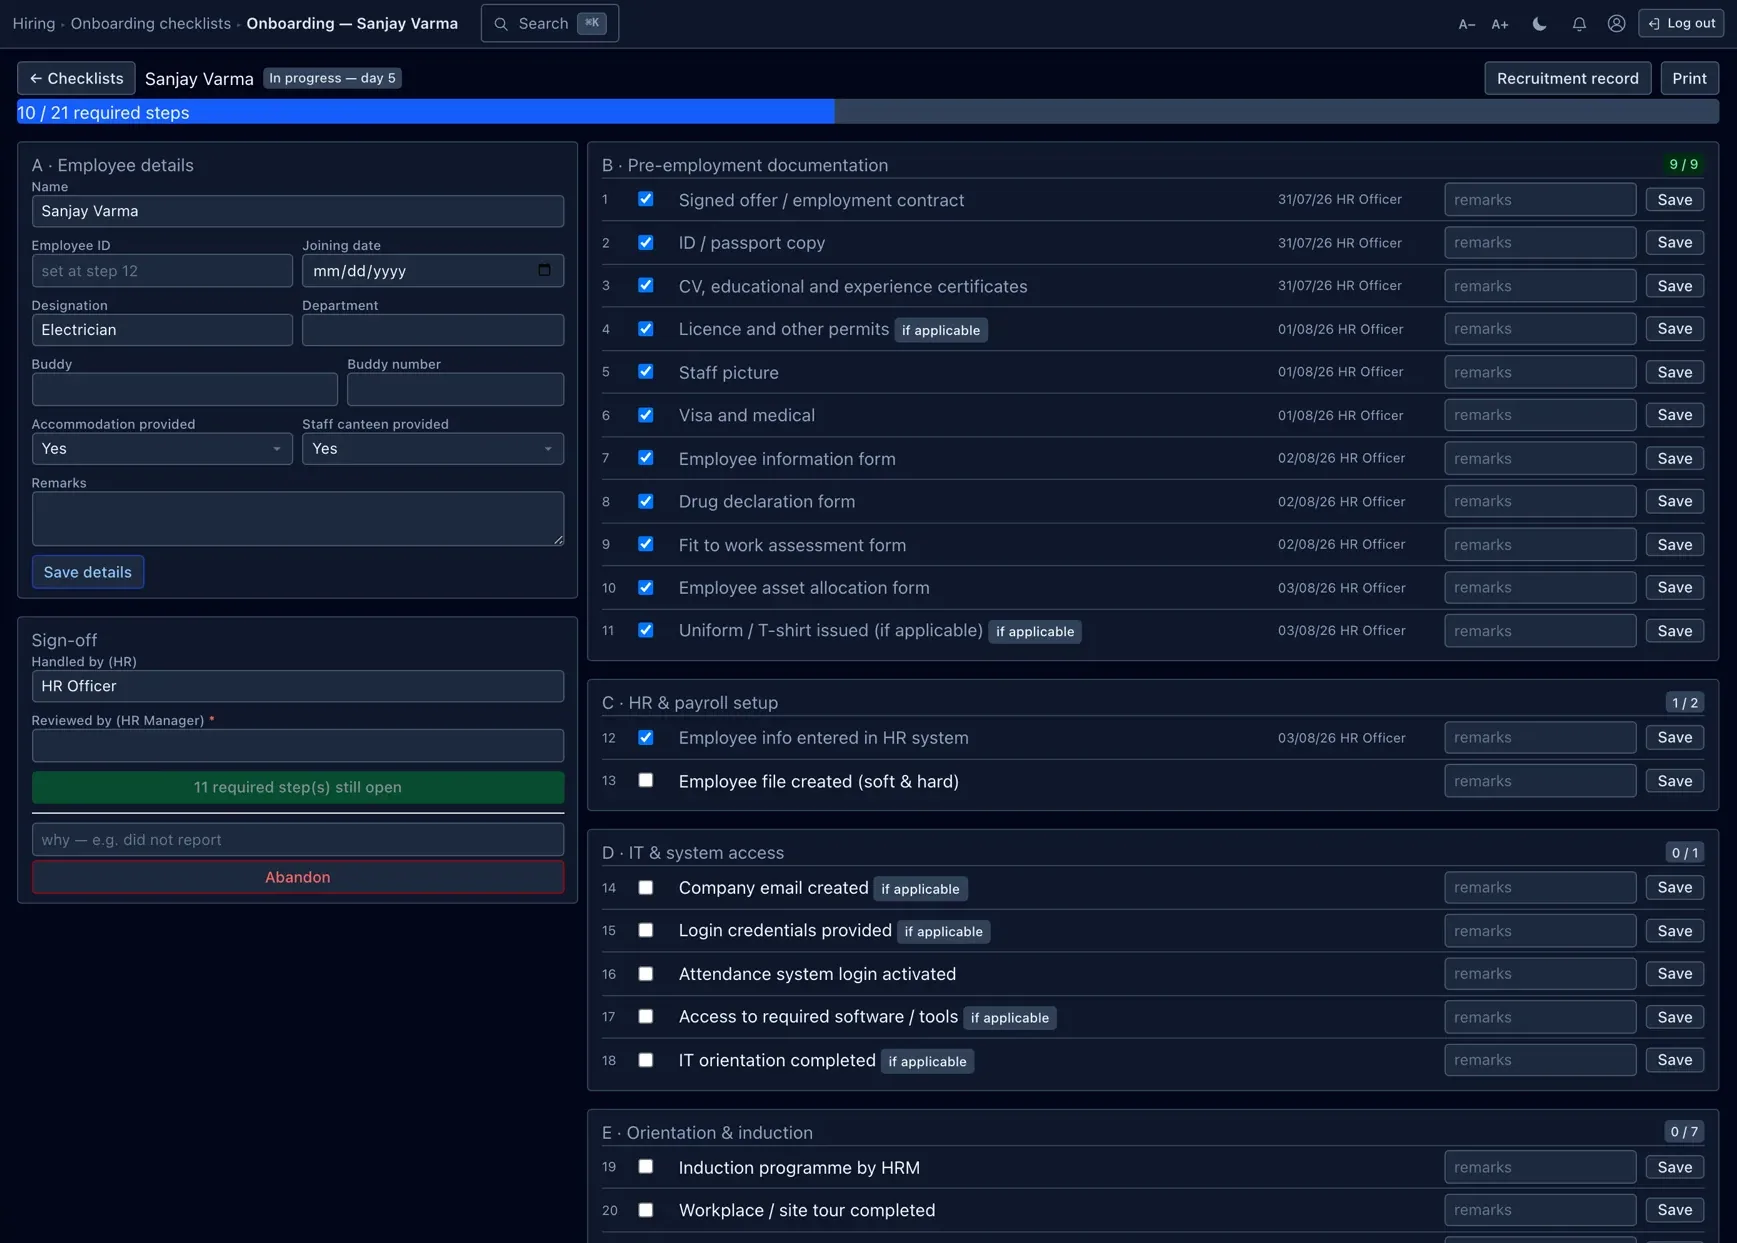
A checklist can begin from any of three places — all of which land on the same list:
- A local hire from the ATS — the checklist is opened automatically the moment the candidate is hired. (Source: Local)
- An arrived expat recruitment request — the usual route for someone hired through the immigration pipeline. (Source: Expat)
- A staff number directly — from the onboarding list, handy for a local hire who didn't go through the ATS at all. (Source: Local)
The checklist is built from your current onboarding template, which every channel shares, and a person can't have two open checklists at once.
Working the checklist
A checklist is grouped into sections that walk from pre-employment through to confirmation — things like pre-employment paperwork, HR & payroll set-up, IT and access, orientation, and final confirmation. You tick items off as they're done.
Items can be marked optional or required — only the required ones must be ticked to finish.
Required reading
A step can require the new joiner to acknowledge a company document — a handbook or policy — before it can be ticked. For that to work the person needs to be linked to a staff record so the acknowledgement is recorded against them. It's the same read-compliance idea covered in the Documents guide.
Sign-off & the employee link
To complete a checklist, every required item must be ticked and a reviewer named. Completing it does two tidy things automatically:
- Links the person to their staff record, joining the dots between the hire and the employee.
- For an expat starter, flips the original recruitment request to Onboarded. (A local hire already had its staff record from the moment of hire.)
If you need to revisit something, reopening a completed checklist sends the recruitment request back to Arrived.
Permissions & gotchas
- ATS · View / Manage — see and run job openings and the candidate board. The ATS is an optional module; where it's off, these screens simply aren't there.
- Recruitment · View / Manage — see and run the expat recruitment pipeline.
- Onboarding · View / Manage — see and run onboarding checklists.
- Recruitment and Onboarding are always available (subject to their permissions); only the ATS front-end is behind a feature switch.
Worth remembering
- The opening's Expat role flag — not the operator — decides which channel a hire takes.
- A local hire needs a staff number at the point of hire; an expat hire doesn't yet.
- A blank candidate name on a recruitment request means it's a vacancy, not a person.
- You can't hand-mark a request Onboarded — completing the checklist does it for you.
- Each checklist is a snapshot of the template; later template edits don't disturb open ones.
- The hand-off from ATS to a hire is forward-only; the onboarding list's Source column shows which channel each starter came through.